
Choose and fit useful accessories for an electric bike, then check that they are secure, compatible, and safe to use. This guide is for new e-bike owners who want to add items such as lights, a lock, a rack, a mirror, or a phone mount. Allow 45–90 minutes, depending on how many accessories you install; this task is beginner-friendly if you can use basic hand tools and follow the bike manufacturer’s instructions.

Get bike and ride gear delivered free with Prime
- Fast, free delivery on millions of items
- Prime Video, Amazon Music and more included
- Member-only deals all year

LISEN Silicone Bike Phone Holder
- ✔ Phone compatibility: 4.7–6.8 inches
- ✔ Maximum phone thickness: 20 mm
- ✔ Handlebar compatibility: Round bars, 0.6–1.57 inches

POWVINE 130 dB Electric Bike Horn for 22.2–32 mm Handlebars
- ✔ Model: EH-2
- ✔ Sound level: 130 dB, manufacturer stated
- ✔ Handlebar diameter: 22.2–32 mm

Adjustable Handlebar Bike Mirrors, Left and Right Set
- ✔ Set: Left and right mirror pair
- ✔ Lens: Convex glass with shatterproof film
- ✔ Adjustability: 360° rotation; 180° adjustment
Difficulty: Beginner | Time: 45–90 minutes
What You’ll Need
Tools & Materials:
- Your bike’s owner’s manual and accessory compatibility information
- Allen keys or other tools specified by the accessory maker
- A tire-pressure gauge or pump, if installing a rack or carrying load
- The accessories and any supplied brackets or fasteners
Knowledge:
- Ability to identify the bike’s frame, handlebars, seatpost, wheels, battery, and controls
- Basic ability to tighten bolts with the correct tool
Check the bike and accessory manuals before buying or fitting anything. Record the bike’s model, year, wheel size, handlebar diameter, and rack mounting points. Use only accessories rated for e-bikes where the maker requires it. Do not attach hardware to the battery, motor, brake hoses, cables, or suspension parts unless the bike maker specifically allows it.
LISEN Silicone Bike Phone Holder
For riders who check directions or ride with a phone accessible, the LISEN Silicone Bike Phone Holder is the most broadly useful choice in this lineup. Its all-around silicone grip and locking mechanism are intended to hold the phone in place while cushioning it from bumps and scratches. The mount installs without tools, which makes it easier to move between compatible bikes or remove when parking. Compared with the POWVINE horn, it helps with navigation rather than alerting people nearby; compared with the TXZSXS mirrors, it depends on having a phone mounted and does not improve rear visibility. Its strongest advantage is the explicit compatibility range: phones from 4.7 to 6.8 inches, up to 20 mm thick, and round handlebars from 0.6 to 1.57 inches. Those limits are also the main reason to skip it if our phone has a bulky case or our bars are flat, unusually shaped, or outside that range. The holder makes the most sense as an everyday convenience accessory, but it is not a universal mount and should not be treated as a replacement for attentive riding.
Pros:
- All-around grip and locking mechanism help retain a compatible phone
- Silicone construction cushions against shocks and scratches
- Tool-free installation supports quick setup or transfer
- Fits a stated range of phones and round handlebars
Cons:
- Only specified for round handlebars measuring 0.6–1.57 inches
- Phone fit is limited to 4.7–6.8 inches and 20 mm thickness
Best for: E-bike commuters and recreational riders who use a compatible phone for navigation and want a tool-free mount with a cushioning grip.
Not ideal for: Riders with flat or oversized handlebars, phones wider than 6.8 inches, or devices thicker than 20 mm.
Bottom line: We recommend the LISEN as the most versatile daily accessory here when our phone and handlebar fall within its stated fit range.
“We recommend the LISEN as the most versatile daily accessory here when our phone and handlebar fall within its stated fit range.”
POWVINE 130 dB Electric Bike Horn for 22.2–32 mm Handlebars
When we want an audible signal at hand, the POWVINE EH-2 offers a more direct solution than either a phone holder or mirrors. Its one-button trigger is easy to understand, and the manufacturer states a 130 dB sound level; that is the feature that sets it apart in this three-product group. Elastic bands allow tool-free attachment to handlebars measuring 22.2–32 mm, and IPX4 water resistance is intended to help it handle splashes. The two replaceable CR2032 batteries avoid a built-in battery that must be recharged, but they do create a small upkeep task; the manufacturer’s claims of up to 200 days and 5,000 rings depend on use and conditions. In comparison, the LISEN holder adds hands-free phone access without batteries, while the TXZSXS mirrors give passive rear awareness without a button or power source. This horn is the clearest choice for riders who want an active alert, but it cannot provide the broader situational view a mirror offers. We should also verify that our bar diameter is within range and that we are comfortable keeping spare coin-cell batteries available.
Pros:
- Manufacturer-stated 130 dB sound output
- Tool-free mounting with elastic bands
- IPX4 water-resistance rating
- Replaceable batteries and a one-button trigger
Cons:
- Requires two CR2032 batteries
- Fits only handlebars measuring 22.2–32 mm
- Does not provide the rear visibility offered by the mirror pair
Best for: Urban riders who want a prominent, button-operated alert and have handlebars measuring 22.2–32 mm.
Not ideal for: Riders who prefer a rechargeable accessory, do not want to replace coin-cell batteries, or have bars outside the stated diameter range.
Bottom line: We would choose the POWVINE when an accessible sound alert is our priority and its bar fit and battery requirements suit our setup.
“We would choose the POWVINE when an accessible sound alert is our priority and its bar fit and battery requirements suit our setup.”
Adjustable Handlebar Bike Mirrors, Left and Right Set
The TXZSXS mirror pair is the dedicated visibility pick: convex glass lenses are designed to show a wide rear view, while 360° rotation and 180° adjustment give us room to set a useful angle. A left and right pair offers a more complete setup than a single mirror, and the included hex key supports installation. Unlike the POWVINE horn, mirrors provide information before we signal; unlike the LISEN holder, they do not compete with a phone for space or require a device to be mounted. The tradeoff is fit certainty. The listing describes compatibility with most flat handlebars across bicycles, e-bikes, mountain bikes and scooters, but does not provide a diameter range, so we should check our bar layout and mounting space before buying. Product information also gives conflicting warranty terms—both lifetime and one year—so we should not rely on a specific coverage period without confirming it with the seller. For riders whose main goal is seeing approaching traffic, this pair offers a distinct benefit; those seeking an audible warning or phone access should choose one of the other accessories instead.
Pros:
- Left and right mirrors provide a paired setup
- Convex lenses are designed for a wide rear view
- 360° rotation and 180° adjustment support angle changes
- Hex key is included for installation
Cons:
- Compatibility is described broadly as most flat handlebars, without a stated diameter range
- Supplied product details conflict on whether warranty coverage is lifetime or one year
Best for: Riders with compatible flat handlebars who want adjustable rear-view coverage on an e-bike, bicycle, mountain bike or scooter.
Not ideal for: Riders who need a precise diameter-based fit guarantee or are primarily looking for a sound alert or phone mount.
Bottom line: We recommend this pair when rear visibility is our priority and our flat handlebars can accommodate the mounts.
“We recommend this pair when rear visibility is our priority and our flat handlebars can accommodate the mounts.”
As an Amazon Associate we earn from qualifying purchases.
Before You Start
Park the bike on a stable surface, switch it off, and remove the battery if the manual recommends doing so for accessory installation. Keep small parts away from the drivetrain and brakes. Never cover a headlight, reflector, brake, display, or cooling vent. Do not exceed the bike’s maximum total weight or the separate load rating for a rack, basket, or child seat. If an accessory requires cutting, splicing, or modifying electrical wiring, have a qualified bike mechanic or the manufacturer handle it.
Step-by-Step Instructions
Step 1: List the accessories you need
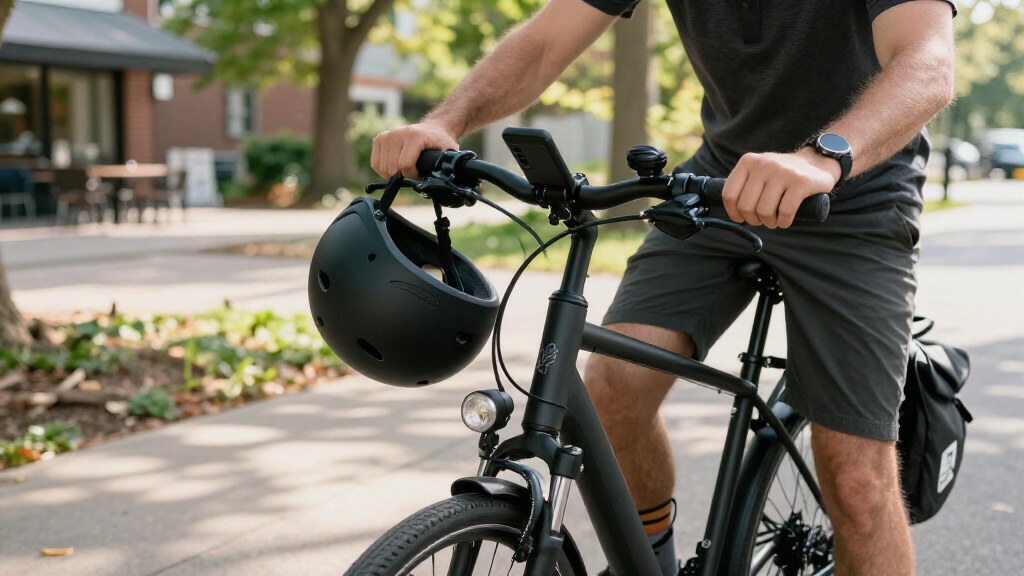
Write down the situations you ride in and choose accessories that address them. For daily commuting, start with a helmet, a strong lock, front and rear lights, and a bell or horn. Add a rack or panniers for cargo, a mirror for traffic awareness, and a phone mount only if it will not block the display or controls. Choose weather protection, such as fenders, if you ride on wet roads.
Prioritize safety and carrying needs before convenience items. Buy one accessory at a time if you are unsure about fit; this makes problems easier to identify and avoids spending on parts that do not suit the bike.
Tip:Some regions require specific lighting, reflectors, or bells. Check local road rules before riding.
Check: You have a short list tied to your actual rides, with safety and load needs addressed first.
Step 2: Check fit and load limits
Compare each accessory’s mounting method with your bike. Confirm handlebar or seatpost diameter, wheel size, frame attachment points, and available clearance. For a rack, verify that the frame has approved rack mounts and that the rack’s load rating covers your intended cargo. Check the bike manual for its total permitted weight, including rider, accessories, and luggage.
Check that a proposed bag, basket, or child seat is approved for the intended position and use. Confirm that no bracket will touch a wheel, tire, brake rotor, suspension part, battery, or moving cable. If dimensions or ratings are unclear, ask the bike or accessory maker before purchasing.
Tip:A generic clamp may not fit a tapered or unusually shaped handlebar. Do not force it or add improvised shims unless the manufacturer approves them.
Check: Every planned accessory has a confirmed mounting location, adequate clearance, and a suitable load rating.
Step 3: Gather compatible parts and tools
Lay out each accessory, its fasteners, and the tools named in its instructions. Check that the parts are complete and that bolts are the correct length. If the accessory specifies a torque value, use a torque wrench set to that value. Do not guess torque on carbon components or other parts with specific limits.
Keep the bike’s own manual nearby. It may specify which fasteners can be used, whether thread-locking compound is allowed, or whether installation should be done by a dealer. Follow those instructions over general advice.
Tip:Do not substitute longer bolts without checking clearance; a bolt can damage a battery, frame, or other component behind a mounting point.
Check: The correct hardware and tools are ready, and any manufacturer-specific torque or installation instructions are clear.
Step 4: Install one accessory at a time
Follow the accessory instructions in order, starting with the mounting point specified by its maker. Loosely position the bracket, align it, and check clearance before tightening. Route straps and cables away from tires, spokes, brake discs, chain, and suspension travel. Tighten fasteners evenly to the stated torque or the maker’s specified method.
For handlebar accessories, sit on the bike and turn the bars fully left and right. For rack or cargo accessories, check that bags cannot reach the wheel or block the rear light. Keep lights visible and aim them so the road is lit without dazzling other road users. Repeat the process separately for each accessory.
Tip:If an accessory shares space with a display, brake lever, shifter, or grip, confirm that every control remains easy to reach before tightening it fully.
Check: The accessory sits in its intended position, its fasteners are tight, and nothing rubs or obstructs controls, wheels, brakes, or lights.
Step 5: Reconnect the bike and test its functions
Reinstall the battery if you removed it, then switch on the bike. Operate the display, assist controls, brakes, bell, and lights. Check that wires remain slack enough for full steering movement and are not pinched or stretched. For a rack or bag, load it within its rating and make sure the load is balanced and secured.
Walk the bike a few steps and listen for rubbing, rattling, or clicking. Squeeze both brakes and spin each wheel to confirm the accessories do not interfere. If a light uses the bike’s electrical system, test it using the manual’s instructions; do not assume a powered display means the light is connected correctly.
Tip:Stop if a brake feels different, a cable is under tension, or a wheel catches. Correct the fit before riding.
Check: All controls and lights work, both wheels and brakes operate freely, and the accessories stay in place during a walking-speed check.
Step 6: Take a short, low-speed ride and recheck
Ride in a quiet, familiar area at low speed. Test steering, braking, visibility, and any loaded rack or basket before using the setup in traffic. Avoid sudden maneuvers while checking a new cargo arrangement. Return after a few minutes and inspect each fastener, strap, cable, and mounting point for movement.
Recheck fasteners after the first longer ride and at the interval stated by the accessory maker. Remove or reposition anything that shifts, rattles, blocks a light, or changes the way the bike steers or brakes.
Tip:A heavy load high on the bike or far behind the rear wheel can change balance and handling. Start with a small load and increase it only if the bike remains stable.
Check: The bike handles and stops predictably, nothing has loosened, and the accessories remain clear of moving parts.
Common Mistakes to Avoid
- Buying an accessory before checking the bike’s mounting dimensions or approved attachment points. — Record the bike model and relevant measurements, then compare them with the accessory specifications before ordering.
- Overloading a rack or exceeding the bike’s total weight limit. — Add the rider, accessories, and cargo together, and follow the lowest applicable rating for the bike, rack, and bags.
- Routing a strap or wire near a wheel, brake, or moving cable. — Turn the handlebars fully and spin both wheels during installation to find interference before riding.
- Tightening a bolt by feel when a specific torque is required. — Use the stated torque and an appropriate torque wrench, or have a mechanic install the part.
Troubleshooting
Problem: The accessory bracket does not fit the bar, frame, or seatpost.
Solution: Stop and check the measurement range and supplied adapters. Do not force the bracket or improvise a spacer; contact the maker or choose a compatible model.
Problem: A light does not turn on after installation.
Solution: Check its battery, switch, connector seating, and mounting orientation using the light and bike manuals. If it connects to bike wiring, leave wiring changes to a qualified mechanic.
Problem: A rack or bag rubs the tire or blocks the rear light.
Solution: Remove the load, adjust the rack or bag within its approved range, and check clearance with the suspension compressed if applicable. Use a different rack or light position if clearance cannot be maintained.
Problem: The bike rattles or handles differently after fitting accessories.
Solution: Stop riding and inspect fasteners, straps, load balance, and wheel clearance. Tighten only to the specified value; remove the accessory or ask a mechanic to check it if the cause is unclear.
What Success Looks Like
The finished setup uses accessories that match the bike’s fit and load limits. Fasteners and straps stay secure; lights and controls work; cables, wheels, brakes, and suspension move freely; and the bike completes a short test ride without rubbing, rattling, or a change in predictable braking and steering.
Next Steps
Before each ride, check that lights work, the lock and cargo are secure, and no fastener or strap has shifted. Inspect rack mounts and other high-load fittings regularly, and follow the maker’s service interval. Reassess the setup when your riding conditions or cargo change. If a part loosens repeatedly, a mount is damaged, or wiring needs repair, stop using that accessory and ask a qualified e-bike mechanic for help.
Frequently Asked Questions
Which accessories should I add first to an electric bike?
Start with required safety equipment and a suitable helmet, then add visible front and rear lights and a lock that fits your parking needs. Add a rack or bags if you carry items regularly. Check local rules for required equipment.
Can I use ordinary bicycle accessories on an e-bike?
Often, but confirm that the accessory fits the bike and is rated for its intended load and use. E-bike speed, weight, and mounting details can affect compatibility. Follow the bike maker’s restrictions.
Can I connect a new light to the e-bike battery?
Only if the bike maker supports that light and connection. Voltage, connectors, and wiring vary by system. Use a compatible approved light or have a qualified mechanic confirm the installation.
How tight should accessory bolts be?
Use the torque or tightening method in the accessory and bike instructions. If no value is provided, ask the manufacturer or a mechanic, especially for carbon parts or frame-mounted hardware.
How can I tell whether a rack is safe for my cargo?
Check the rack’s load rating, the bike’s rack and total weight limits, and the bag or child-seat maker’s requirements. Keep the load secured and balanced, then test the bike at low speed before riding in traffic.
Fall Picks
fall essentials
As an affiliate, we earn on qualifying purchases.