To bed in new brake pads and prevent squealing, find a safe, open area and perform 8 to 10 gentle stops from around 30-40 mph, gradually increasing brake pressure with each stop. This heats the pads and creates an even transfer layer between the pads and rotors. Avoid hard stops or riding the brakes, and continue with moderate stops for the first few hundred miles. For more detailed steps and tips, keep exploring how proper bedding can optimize your brakes.
Key Takeaways
- Perform 8-10 controlled stops from 30-40 mph to gradually heat the pads and create an even transfer layer.
- Avoid hard or aggressive braking to prevent glazing and ensure proper pad-to-rotor contact.
- Gradually increase braking intensity during the bedding process to generate adequate heat without abrupt stops.
- Post-bedding, perform moderate stops from higher speeds and avoid aggressive braking for the first 200 miles.
- Maintain consistent, even contact during braking to prevent squealing and ensure optimal brake performance.

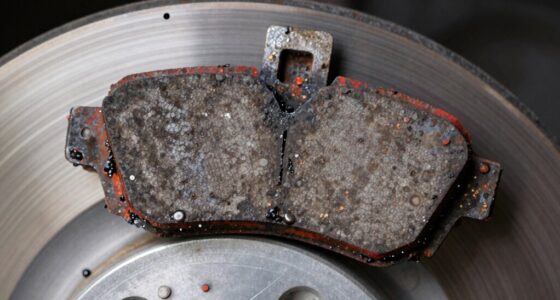
Breaking in new brake pads is vital to guarantee peak performance and longevity. When you install fresh pads, the materials used—whether organic, ceramic, or semi-metallic—require a proper bedding process to ensure they work smoothly and quietly. Different brake pad materials have specific needs, but the general goal remains the same: create a strong, even transfer layer between the pads and rotors. This layer helps eliminate chatter, squeal, and uneven wear, making your braking experience safer and more reliable.
The bedding process steps are straightforward but essential. First, you want to find a safe, open area where you can perform a series of controlled stops without traffic or hazards. Start by accelerating gently to around 30-40 mph, then apply firm, consistent pressure on the brake pedal to bring your vehicle down to a stop. Do this multiple times—typically 8 to 10 stops—allowing the brakes to heat up gradually. The heat helps the brake pad materials conform to the rotor surface, creating that ideal transfer film. Be sure to avoid hard, aggressive stops or riding the brakes constantly, as this can cause uneven pad deposition or glazing.
As the process continues, increase the intensity slightly but stay within safe limits. The goal is to generate enough heat to burn off any residual manufacturing oils or contaminants from the pads, which can cause squealing or reduced braking performance. Once you’ve completed the initial bedding, perform a few more moderate stops from higher speeds, such as 50-60 mph, to further enhance the pad-to-rotor interface. After these steps, avoid aggressive braking for a period—typically the first 200 miles—so the pads can fully settle and develop a consistent, smooth contact surface. Additionally, maintaining proper color temperature during bedding can help optimize the process and prevent glazing or uneven wear.

Orion Motor Tech Brake Bleeder Kit with Hand Vacuum Pump and Adapters, Brake Bleeding Kit for Brake Fluid Power Steering Fluid More, Vacuum Brake Bleeder Pump with Pressure Gauge
YOUR TRIP COMPANION: With Orion Motor Tech's brake bleeder kit, say goodbye to the old days when it…
As an affiliate, we earn on qualifying purchases.
As an affiliate, we earn on qualifying purchases.
Frequently Asked Questions
How Long Does the Bedding-In Process Typically Take?
The bedding-in process usually takes about 300 to 500 miles, depending on driving conditions. During this abrasion process, you’ll want to avoid hard braking and instead perform gentle stops to guarantee proper surface preparation. This helps the brake pads and rotors settle evenly, preventing squeals. Drive gradually, shifting from light to moderate braking, and give the pads enough time to conform to the rotors for ideal performance and quieter braking.
Can I Bed in New Brake Pads on Wet Roads?
You can try bedding in new brake pads on wet roads, but it’s not perfect. Wet conditions reduce friction, making it harder to properly bed in the pads and risking uneven wear or squealing later. For road safety, it’s better to do the bedding process in dry conditions, ensuring your brakes develop peak performance and reduce noise. Always prioritize safety and avoid aggressive braking on wet surfaces.
Is It Necessary to Replace Brake Fluid When Installing New Pads?
You don’t always need to replace brake fluid when installing new pads, but it’s highly recommended if the fluid is old or contaminated. Brake fluid absorbs moisture over time, which can drastically reduce braking performance—like trying to stop a freight train with a feather. A fluid replacement ensures your braking system works smoothly and safely. Check your manufacturer’s guidelines, and consider a brake fluid flush for maximum safety and performance.
Will Bedding-In Prevent All Brake Squeal Permanently?
Bedding-in substantially reduces brake noise and helps guarantee even pad wear, but it won’t prevent all squeal permanently. Over time, factors like dirt, moisture, and pad wear can cause noise to return. To maintain quiet brakes, regularly inspect and clean your brake components, and replace pads when they become worn. Proper bedding creates a good initial contact, but ongoing maintenance is essential for long-term quiet braking.
How Do I Know if My Brake Pads Are Properly Bedded?
You’ll know your brake pad bedding is proper if the squeal disappears and braking feels smooth and consistent. During the bedding process, you should notice your brakes gradually become quieter, indicating effective squeal prevention. Check for any uneven wear or vibrations, as these can signal incomplete bedding. Drive gently after bedding, and if squealing persists, revisit the bedding steps to confirm your pads are properly bedded for maximum squeal prevention.

Bendix Premium SBC1363 Ceramic Front Brake Pads for select Cadillac Escalade, ESV, EXT, XTS, Chevrolet Avalanche, Cheyenne, Express 1500, Silverado, Suburban, Tahoe, GMC Savana, Sierra Classic, Yukon
OE REPLACEMENT: Designed and engineered to OE specifications for fit, form, and function. OEM Equivalent Part Number: 22742382
As an affiliate, we earn on qualifying purchases.
As an affiliate, we earn on qualifying purchases.
Conclusion
Now that you’ve bedded in your new brake pads, think of it like planting seeds for a future full of smooth stops. Properly breaking them in guarantees they develop a strong, reliable grip, much like a tree grows sturdy roots. Skipping this step is like planting in poor soil—your brakes might squeal or fade when you need them most. Take the time now, and your brakes will serve you faithfully, quiet and confident, for miles to come.

Lunhans Wheel Hub Cleaning Tool Kit, Wheel Hub Resurfacing Kit & Stud Cleaner with 8 Pads – Rust Removal Tool for Brake Rotors, Hubs & Bolts – Fits 1/2” Wrenches or Electric Drills
[Efficient Rust Removal] This professional Wheel Hub Cleaning Tool quickly removes rust and corrosion from wheel studs, drums,…
As an affiliate, we earn on qualifying purchases.
As an affiliate, we earn on qualifying purchases.

Maasechs Press Brake Die Protection Film – Urethane Protective Film for Press Brake Dies, Metal Bending Die Guard Tape, Prevent Scratches on Stainless Steel & Aluminum(4" X. 012" X 100')
Protect Press Brake Dies: urethane die protection film prevents scratches, dents, and marks during metal bending; Ideal for…
As an affiliate, we earn on qualifying purchases.
As an affiliate, we earn on qualifying purchases.