To remove a stubborn tire without damaging your rim tape, deflate the tire completely and gently insert tire levers between the bead and rim, working carefully around the wheel. Use soapy water or lubricant to ease stubborn spots, wiggling the bead free gradually. Keep an eye on the rim tape for tears or shifts, and replace or adjust it if needed. For more tips on handling tough tires safely and effectively, keep exploring.
Key Takeaways
- Fully deflate the tire before attempting removal to reduce resistance and prevent rim tape damage.
- Use proper tire levers gently inserted between the bead and rim, working evenly around the wheel.
- Apply soapy water or a lubricant to the bead to ease it over the rim, reducing force needed.
- Inspect rim tape carefully for tears or shifts during removal, replacing or repositioning if necessary.
- Patience and gradual work prevent rim tape damage and facilitate easier, safer tire removal.

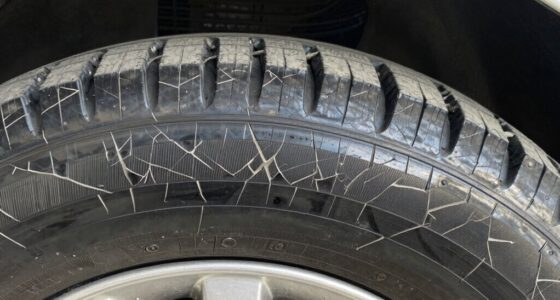
Removing a stubborn tire can be frustrating, especially when it refuses to budge despite your efforts. It’s a common challenge, but with the right approach, you can get the job done without damaging your rim tape or risking further complications. Start by confirming you have the proper tools—preferably tire levers designed for bicycle tires or a set of plastic pry tools. Using the correct equipment minimizes the risk of scratching or tearing your rim tape. Before you begin, double-check that your tire is deflated completely; sometimes, residual air pressure can make removal more difficult. Once deflated, work your tire levers carefully, inserting them between the tire bead and the rim, and gently pry the tire away from the rim. If you encounter resistance, avoid forcing the lever, as this can damage the rim tape underneath. Instead, try to gently wiggle the bead, working your way around the wheel to loosen the tire evenly.
Patience is key here. If the tire refuses to come off, consider applying a bit of soapy water or a lubricant around the bead, which can help the tire slide more easily over the rim. Be cautious not to use harsh chemicals, as they might degrade the rim tape over time. As you work, keep an eye on the rim tape—any tears or shifts can compromise its integrity, leading to potential flat tires later. This is where rim tape maintenance becomes essential; inspect it thoroughly during tire removal, replacing or adjusting it if necessary. Proper rim tape maintenance ensures a smooth tire installation later and protects your tube from spoke punctures.
Additionally, understanding the contrast ratio of your tire and rim setup can help you select the best tools and techniques for removal, especially for high-performance or specialized tires. When you finally remove the stubborn tire, take a moment to clean the rim thoroughly. Remove any dirt, debris, or old adhesive residue that could interfere with a proper seal during reinstallation. This is also the perfect time to double-check your tire installation tips for future reference: always ensure the bead is evenly seated on both sides of the rim and that your tube is correctly aligned before inflating. Being meticulous now saves you time and effort in the long run. Remember, patience and careful handling are your best allies in avoiding rim tape damage and ensuring a smooth, hassle-free tire replacement. With these steps, you can conquer even the most stubborn tires without risking your rim tape or your sanity.

UYIii Bicycle Tire Levers 3 Pack – Ultra Strong Tire Removal Tool for Road or Mountain Bike Tires.
Designed for Bicycle Tire – fits closely to the contours of Bicycle Tires and is easy to remove…
As an affiliate, we earn on qualifying purchases.
As an affiliate, we earn on qualifying purchases.
Frequently Asked Questions
Can I Reuse Rim Tape After Removing the Tire?
Yes, you can often reuse rim tape after removing the tire. First, inspect the rim tape closely for any damage or signs of wear, especially around the edges and the tire bead grip area. If it’s still intact, clean it thoroughly and ensure it maintains a smooth surface. If it shows cracks or deformation, it’s best to replace it to maintain proper tire bead grip and prevent flats.
What Tools Are Safest for Stubborn Tire Removal?
You should use tire levers made of plastic or nylon for stubborn tire removal, as they’re gentler on your rim and safer than metal tools. Compare tools by their durability and ease of use, always prioritizing safety precautions like wearing gloves and working carefully to avoid damaging the rim or tire. Avoid metal screwdrivers or sharp objects, which can cause accidental damage, and work slowly to prevent injuries.
How Do I Prevent Rim Tape Damage During Removal?
Imagine your rim tape as a delicate silk ribbon—treat it like that. When removing the tire bead, gently pry it away from the rim, avoiding sharp tools that can scrape or tear the tape. Check for rim corrosion, which can make removal tricky; clean it carefully first. Use soft tools and steady pressure, and you’ll keep your rim tape intact, preventing damage and ensuring your wheel stays in perfect shape.
Is It Necessary to Deflate the Tire Completely First?
Yes, you should completely deflate the tire first. Lowering the tire pressure makes removal safer and easier, reducing the risk of sudden pops or damage. Always follow safety precautions by wearing gloves and eye protection, and handle tools carefully. Fully deflating the tire guarantees you have better control, minimizes the chance of damaging the rim tape, and makes the removal process smoother and safer for you and your bike.
How Long Should I Wait Before Trying Again if It’s Stuck?
Think of tire removal like peeling a stubborn sticker; rushing only makes it stick tighter. If your tire’s stuck, give it at least 15-20 minutes to loosen its grip through tire adhesion. Patience is key—trying again too soon can damage your rim tape or worsen the situation. Wait, gently reapply some lubricant, and then try again. This careful approach guarantees smoother removal without unnecessary damage.

PSLER Bicycle Rim Liner 26inches, Bicycle Tire Liner Rim Tape Bicycle Rim Strip 2 Bicycle Tire Liners Bicycle Accessories
Fitment: Bicycle rim liner for 16" 20" 24" 26" 27.5" 29"/700C Rim.Protect inside inner tube
As an affiliate, we earn on qualifying purchases.
As an affiliate, we earn on qualifying purchases.
Conclusion
Think of removing a stubborn tire like freeing a trapped bird—gentle persistence wins over force. With patience and the right tools, you’ll loosen the grip without harming your rim tape, much like coaxing the bird to fly free. Remember, rushing only risks damage. Keep calm, stay steady, and soon your tire will be loose, ready to be replaced or repaired. You’ve got this—success is just a careful, gentle effort away.

Ru-Glyde Tire Mounting Lubricant by AGS – 1 Gallon | Tire Bead Seating Lube & Rubber Rejuvenator | Prevents Rim Rust | No-Mix, Ready-to-Use Formula for Tire Changers, Auto Shops & DIY Tire Install
SEATS TIRE BEADS SMOOTHLY ON THE FIRST TRY — Ru-Glyde's thick, stay-put formula coats the bead and rim…
As an affiliate, we earn on qualifying purchases.
As an affiliate, we earn on qualifying purchases.
UYIii Bicycle Tire Levers 3 Pack – Ultra Strong Tire Removal Tool for Road or Mountain Bike Tires.
Designed for Bicycle Tire – fits closely to the contours of Bicycle Tires and is easy to remove…
As an affiliate, we earn on qualifying purchases.
As an affiliate, we earn on qualifying purchases.